
How to Grill the Best Beef Tenderloin
I’ve probably written three hundred blog posts, but I’ve never written about grilling meat. Today, however, is Father’s Day, and as an ode to the ten thousand ways my father has blessed me, I offer you my best rendition of my father’s instructions for grilling a beef tenderloin.
I’ve watched him grill tenderloin several times, but two weeks ago, I tried myself. We had company coming over. Our church was hiring a new pastor, and we invited the new pastor, his wife, and the pastoral search team for dinner. With the help of others, we cooked for fourteen adults, plus my children.
By the way, we’re in the middle of a kitchen remodel, and we didn’t have countertops yet. You could see into our unfinished basement through a hole in the floor. My giant new stainless-steel refrigerator sat in the living room. You get the picture. It was a mess.
Despite the remodeling chaos, the grilling turned out so good that others asked for the recipe. I tried to text it to my friend but realized it might be more fun to write it out here with more detail. Posting it to my blog will also help me not be typecast as a blogger who only writes about church stuff.
One more bit of background before I begin. I’m sure this is an overstatement, but in my memory, every Sunday night when I grew up, Dad would grill, and we’d have a huge family dinner. I miss that. A lot. My wife and I have tried to follow the Lord where he’s sent us, but that following has always put us too far away to join in Sunday night meals, except for when we’re all visiting each other on vacation. But when we do, and Sunday night comes around, Dad still doesn’t disappoint.
Below is my best attempt to recount his recipe. It’s derivative, of course, but it comes from a master griller, so the recipe should still serve you well.
And thank you, Dad, for being an even better father than you are a griller.
* * *
The Best (Grilled) Beef Tenderloin
STEP 1: Buy the meat [the day before dinner]
The first step to having a great meal, my father always says, is to “buy nice meat.” And it will probably be better if you bought the meat recently and never froze it. If the meat starts frozen, make sure you thaw it slowly in the fridge for several days before you want to cook it. This seems to not damage the meat in the way blasting it under hot water does. You can do that with frozen hot dogs, but you won’t want to do that with beef tenderloin because . . .
Beef tenderloin is expensive. The cut of meat is a long cylinder of high-quality cow. A tenderloin is about as round as your forearm and probably as long as from your elbow to your fingers. The “filet mignon” is the last portion of the beef tenderloin, which is why buying a beef tenderloin costs a lot. It’s basically two feet of filet.
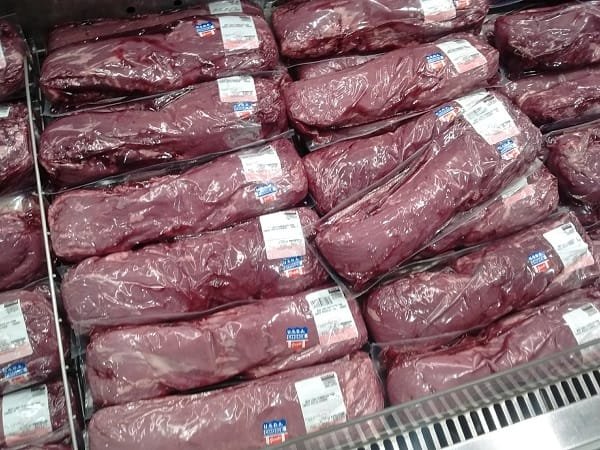
I try to get mine from Costco because that’s how—as with everything else in this recipe—my dad does it. They come in packages of about 4–5 lbs. and at a price of about $20–25 per pound. You’ll need about half a pound per person unless you’re also serving another main dish, something like chicken, which can help keep the cost of the meal down.
I’ll insert a quick comment here about “side dishes.” This one also comes from my father. Make sure you have nice sides to go with the meal. It makes the meat taste better, he says. I agree.
STEP 2: Marinate the meat [6 hours before dinner]
Take the meat out of the fridge and poke lots of holes in it. You can poke the holes with something like a kebab or a corn-on-the-cob holder. Last time my son and I used a marshmallow roaster to poke the holes.
After adding the holes, put the meat in a metal tray and pour a marinade over the meat. I’d suggest something like Dales Original. After you cover the meat, put it back in the fridge. This sounds weird, but you want a marinade that will make the meat taste like better meat, not a marinade that will make the meat taste like something else, like a Greek salad or stir fry. Save those kinds of marinades for other meals.
STEP 3: Dry the meat and apply a rub [4 hours before dinner]
Take the meat back out of the fridge and dry off the meat using paper towels. You can end up putting the meat back in the same tray, but you’ll need to rinse it off and dry it as well.
Once the meat is dry, apply a liberal amount of black pepper all over the meat. You’ll also want to add salt or meat tenderizer. If I sprinkle on meat tenderizer, then I don’t also use salt because it can make it too salty tasting. You can also rub other spices onto the meat, such as a light touch of rosemary or crushed red pepper. Our house likes spicey food, so I use both. Return the meat to the refrigerator.
STEP 4: Let the meat warm [2 hours before dinner]
Take the meat out of the fridge to let the meat begin to warm to room temperature.
STEP 5: Get the grill hot [90 min before dinner]
Begin heating your charcoal grill to 450 degrees. You can use a gas grill, of course. I do that too. My Dad has bought me the best Webber Grill version of each, and I’m super thankful for that. I love the convenience of the gas grill and use it more often, but when I’m cooking something expensive, such as beef tenderloin, I try to use the charcoal grill because I think it tastes better. My family agrees.
STEP 6: Sear the meat [65 minutes before dinner]
Place the meat on the hottest part of the grill, and turn it every 1–2 minutes to sear all sides. Make sure you cover the grill each time, so you don’t lose all your heat.
STEP 7: Cook the meat [55 min before dinner]
Now it’s time to do the main portion of cooking. Place the meat in a metal tray on the grill. Continue cooking at 450 degrees. Turn the meat every 15 minutes.

Apply drizzles of olive oil each time. To do this, I like to put the olive oil in a bowl and just use a spoon. Don’t be stingy, especially at the ends of the meat. You don’t want them to burn, as they will be thinner. And if you can, try to keep the ends away from the hotter parts of the grill.
One other trick. You have to build little ridges made of tin foil along the bottom of the tray. You can actually buy them, but I just make them by rolling up little strips of tinfoil. These ridges sit at the bottom of the metal tray, so the meat doesn’t sit on the bottom. This helps get airflow underneath and not burn the bottom.
STEP 8: Remove the meat [20 min before dinner]
Remove meat when the internal temperature of the “thick” part of the tenderloin is about 130–135 degrees. This will set you up for a final cooking of “medium-rare” in the thick middle of the tenderloin and more like “medium” on the thinner ends. This spectrum is good when you have company who likely have different preferences about how they like their steak cooked.
You’ll need a meat thermometer for this. And as has been the theme, my dad bought me a fancy Bluetooth one by the company Meater. It literally sends the external and internal temperature to your phone and makes a graph as it cooks. You don’t need anything this fancy, though.
Once you remove the meat from the grill, place the meat in a new tray and cover it with tin foil to keep the heat in. It would be best if you now let the meat “rest” for 20 minutes. While the meat is covered and resting, it will stay warm and continue to cook a little. The resting lets the juices stop moving, so they won’t rush out when you cut the meat. That’s my non-technical explanation. I’m sure my dad or Bobby Flay could explain it better.
Cooking the meat to the right temperature and taking it off at the right time is the most important step. You can always cook it more, so error on less-cooked than over-cooked.
STEP 9: Check the temperature [10 min before dinner]
If you’re nervous about what the meat looks like, whether too rare or too well-done, you can cut part of the thickest section of the meat to see how it looks and whether you have your desired amount of pinkness. If the meat is too pink, you can cut the meat into a few chunks and put it on the grill for a few more minutes. Cutting it into smaller chunks is not ideal, but it speeds up the process.
STEP 10: Cut the Meat [1 min before dinner]
Now, put the meat on a cutting board and cut the meat using an electric knife. If you don’t have one, just use your best steak knife. Try to make circle sections of about 1/4”–1/2” in thickness.
Then put the meat on a serving tray and cover it with tin foil. If you have a serving dish that has a lid, you can use that instead. It will look nicer. And if you’re serving $130 of beef tenderloin that took six hours to prepare, you might as well make it look nice. When we had company the other week, since people had already seen the holes in my kitchen floor and my fridge in the living room, I just covered the meat in tin foil. No one complained.
STEP 11: Eat the meat [dinner time]
Enjoy with friends and family and give thanks to God.